
Gimbal Calibration
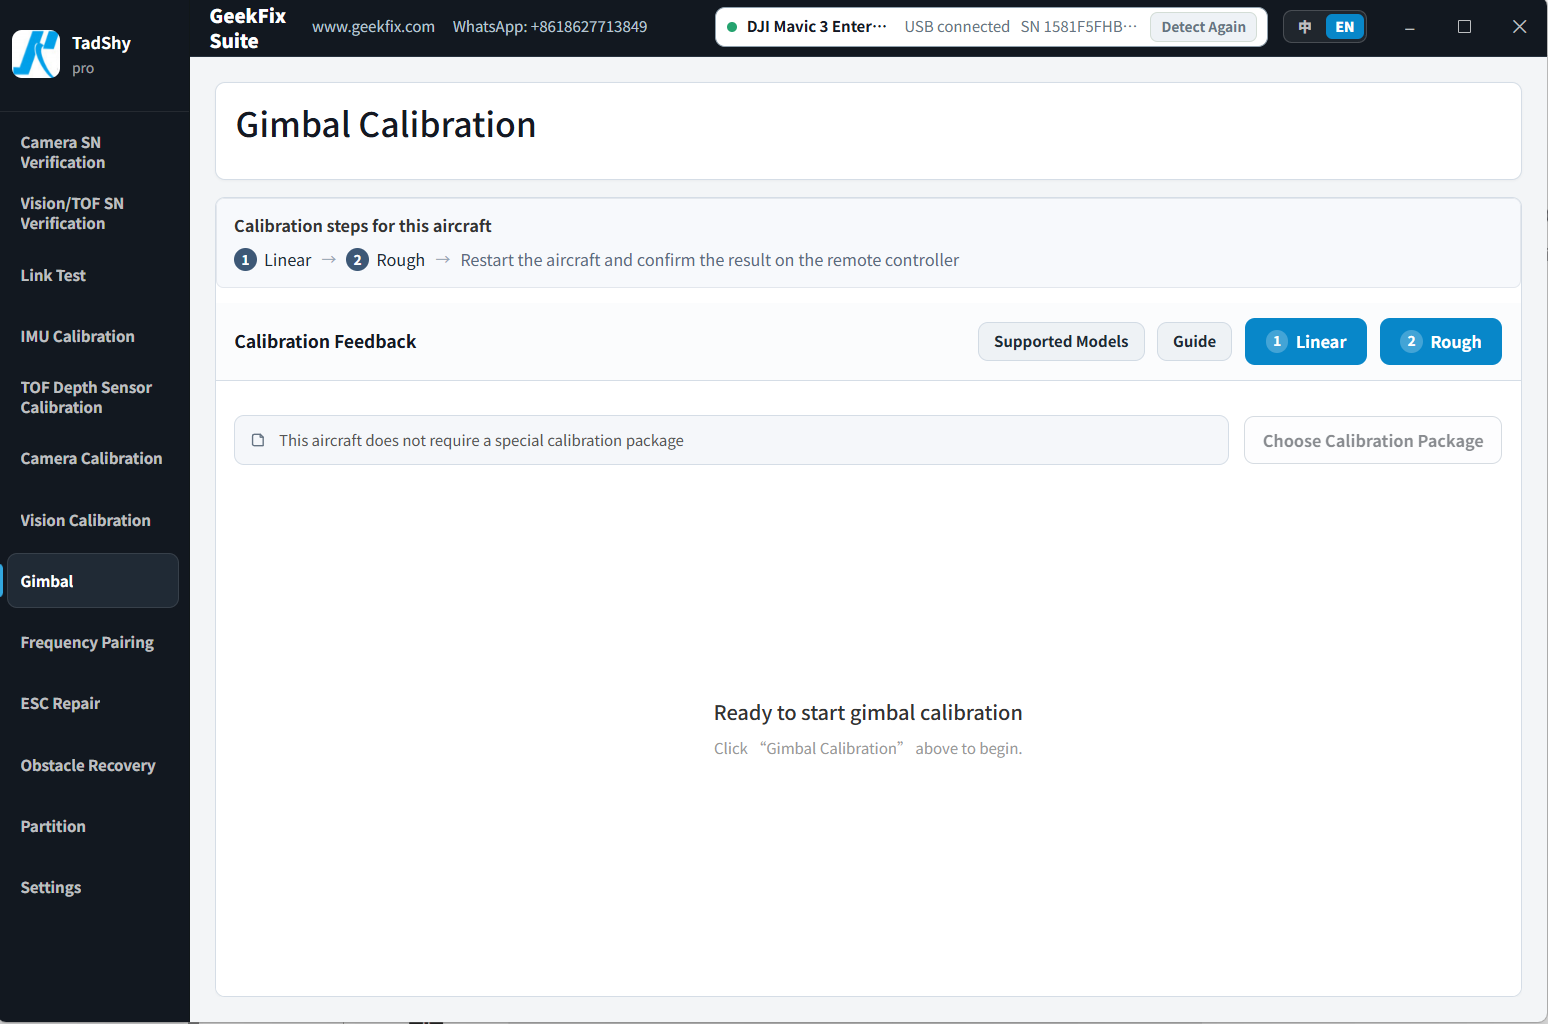
Calibrates the gimbal of the connected aircraft, for repair scenarios such as a tilted gimbal or gimbal errors. Different models use one of two flows: direct USB calibration or the calibration-package flow. The software automatically shows the matching interface for the connected model — you don't need to choose.
Before You Start
- Make sure nothing blocks the gimbal and the aircraft is on a flat surface.
- Make sure the gimbal clamp (protective cover) is removed.
- Make sure the aircraft battery has enough charge.
- Have the remote controller ready: for models using the calibration-package flow, calibration is finished on the controller after the package is written; some direct-USB models also need controller calibration after the Rough step.
- The aircraft is powered on, connected to the computer, and detected (see Connect a Device).
- Your account has Gimbal Calibration access.
Flow 1: Direct USB Calibration (most newer models)
- After the aircraft is detected, open Gimbal Calibration.
- The banner at the top of the page shows Calibration steps for this aircraft; the ①/② numbers on the Rough and Linear buttons mark the correct order for the connected model:
- Most models: run Rough first, then Linear.
- Mavic 3 Enterprise series (Mavic 3E/3T/3M): run Linear first, then Rough.
- Click through the steps in the numbered order. Do not unplug the USB cable or power off the aircraft during the process.
- After both steps, restart the aircraft and confirm the gimbal status on the remote controller.
Avata / Avata 2 / Neo note: after the Rough step, unplug the USB cable and finish gimbal calibration on the remote controller; the calibration error on the aircraft only clears after that. Controller calibration for these models does not require holding the aircraft upright.
Flow 2: Calibration-Package Flow (Mini / Air 2 / some Mavic 3 models)
Supported models: Mini SE, Mini, Mini 2 SE, Mini 2, Mini 3, Mini 4K, Mini 3 Pro, Air 2, Air 2S, Mavic 3 Classic, Mavic 3.
- Get the calibration package first: request the calibration package from support, then choose the package file that matches your model.
- After the aircraft is detected, open Gimbal Calibration.
- Click Choose Calibration Package and select the package file that matches the connected model. The software verifies the package; if verification fails, check the model and choose again.
- Click Calibrate & Install. The software runs a pre-calibration first, then writes the package. Do not unplug the USB cable or power off the aircraft during the process.
- After writing, unplug the USB cable as prompted and finish gimbal calibration on the remote controller.
- If controller calibration stays still for about 3 seconds at the final stage (usually above 90%, though it may also finish without pausing), immediately hold the aircraft upright and keep it vertical until calibration completes.
- After controller calibration, use DJI Assistant 2 to restore the factory software.
- Restart the aircraft and confirm the gimbal status on the remote controller.
OSMO Pocket 3
- Power on first, then connect to the computer. When the device screen offers "OTG Connection" or "Webcam", don't tap them — tap "Cancel".
- Place the device on a flat surface and remove the gimbal clamp; after the device is detected, open Gimbal Calibration and start calibration. Keep the device perfectly still throughout.
- Calibration takes about 20 seconds. Nothing pops up on the device screen and no on-device action is needed; it is normal for progress to pause at a percentage for a few seconds (data collection).
- Do not unplug the USB cable or close the software during the process.
- After calibration completes, restart the device and confirm the gimbal status on its screen.
Notes
- The calibration-package flow must end by restoring the factory software, otherwise the aircraft's original features will not work properly.
- If the page says calibration cannot run in the current connection state, power-cycle the aircraft and reconnect the USB cable, then detect it again.
- If you click in the wrong order (for example, running Linear first on a model that should start with Rough), the software warns you — just follow the prompt to adjust.
If Something Goes Wrong
- Calibration interrupted: power-cycle the aircraft and try again.
- Pocket 3 calibration failure: it does not harm the device — power-cycle the device and safely try again.
- Repeated failures: usually a hardware problem with the gimbal body or its cables; have the hardware repaired first, then calibrate again.
- Still failing after several attempts: take a screenshot and contact 181806465@qq.com.
Supported Models
34 models in total (direct USB and calibration-package flows). The full list is in the Supported Models matrix.