
Vision Calibration
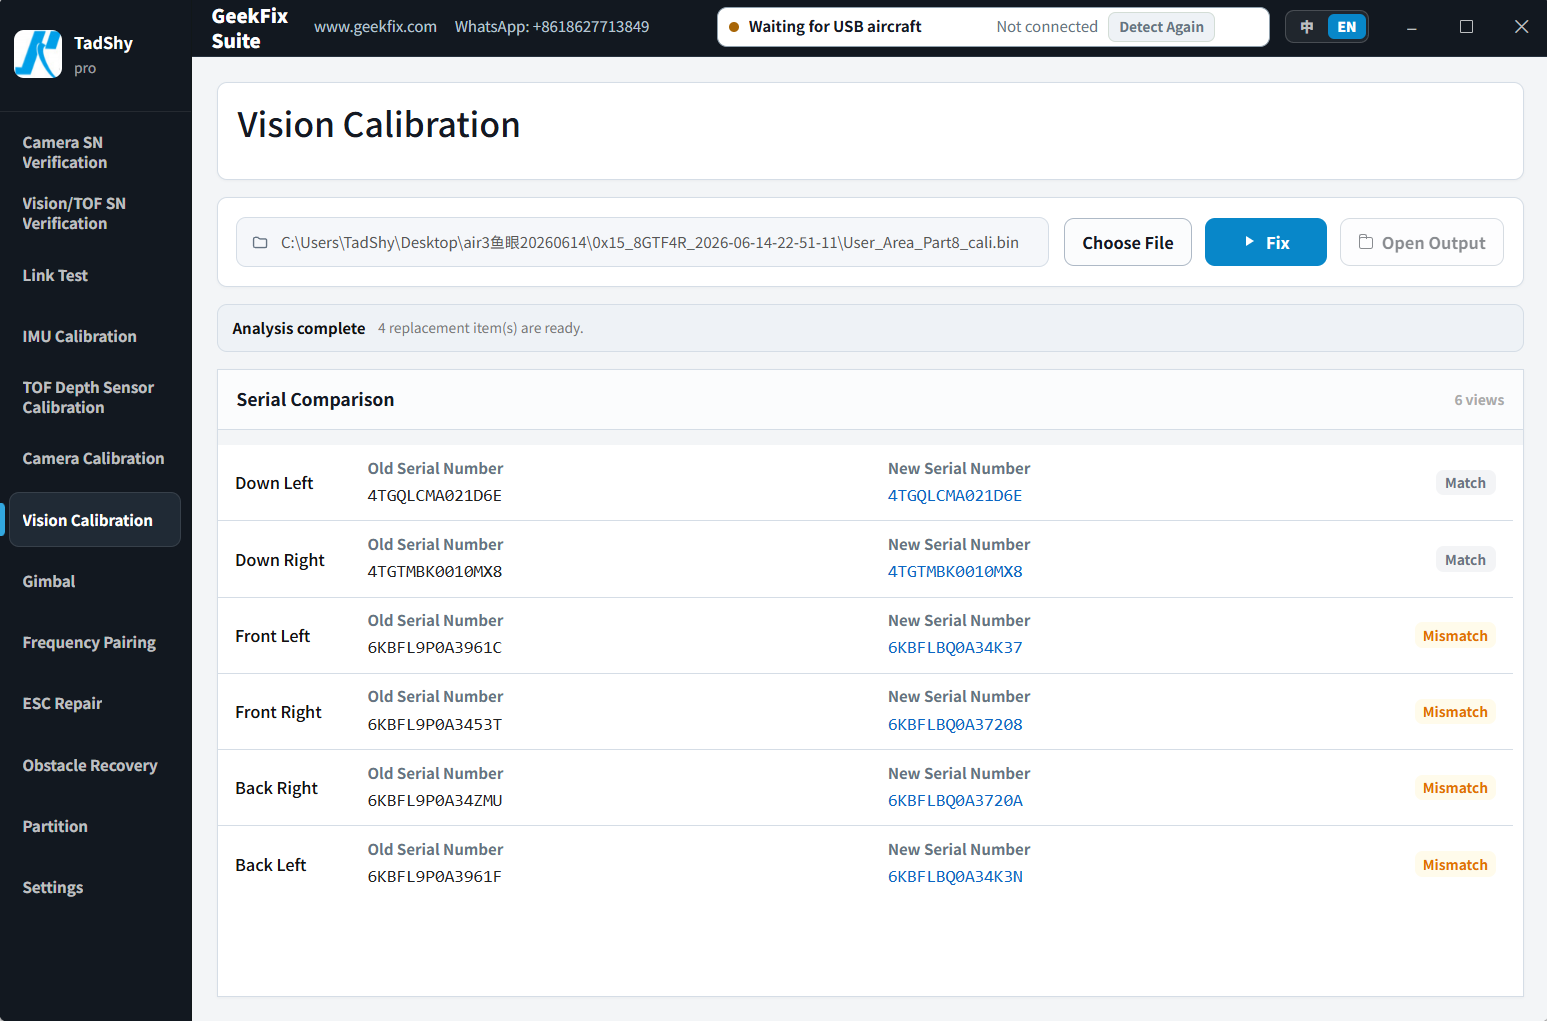
Analyzes offline vision calibration images, compares and fixes the vision calibration SN inside them, and generates a new fixed image with an automatic re-check — the original image is never modified.
When to Use
- After replacing a vision sensor, fix the vision calibration data in the image.
Before You Start
- Install the new vision sensor (technicians often call it the "fisheye") on the aircraft, power it on and let it boot into the system once, then export the image and use this feature — this step is required, otherwise the feature will not work.
- Have a valid vision calibration image (a cali file) ready.
- Your account has Vision Calibration access.
Steps
- Open Vision Calibration and click Choose File to select the cali image.
- Check the Serial Comparison: the view marked Mismatch is the vision sensor that was replaced.
- Click Fix.
- Click Open Output to find the generated file.
- Write the new file back to the aircraft (using Partition R/W or another programmer), then restart the aircraft to confirm.
Reading the Results
- The software identifies by image layout and only generates a new image when the layout meets the requirements; otherwise it explains the reason and refuses to generate, rather than guessing and forcing changes.
- After generation, the software automatically re-checks to confirm the new image is usable.
If Something Goes Wrong
- If the software says the image does not meet the layout requirements: check the source and integrity of the image.
- If it keeps failing: take a screenshot and contact 181806465@qq.com.
Supported Scope
Detection is based on the image layout, not a fixed model list. See the Supported Models for details.